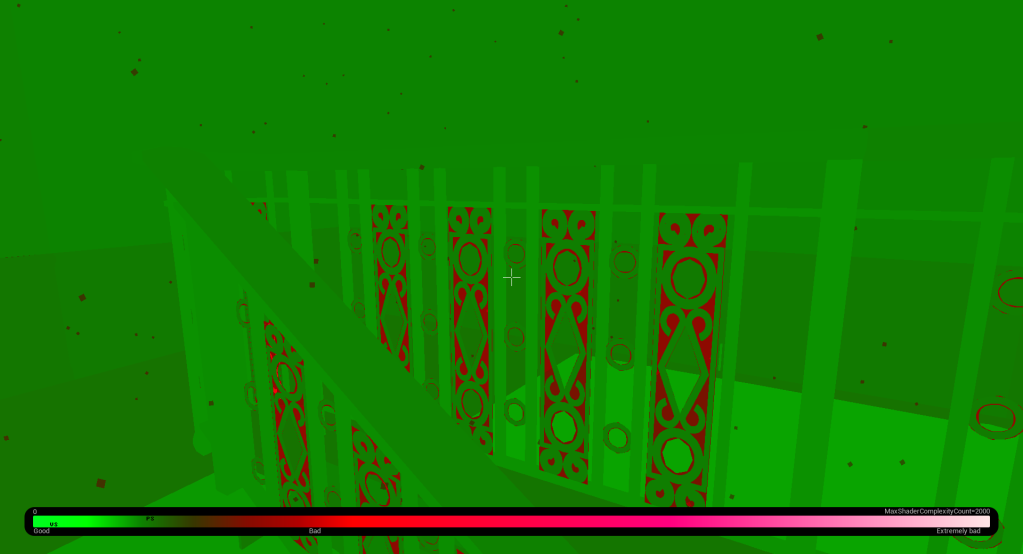
This week’s focus has been very heavily geared around creating interiors, more material work, and figuring out a lighting workflow which allows for a high standard of lighting with an optimal frame rate and frame pacing (revised lighting workflow took FPS from 30-40 average to 70-80 FPS).
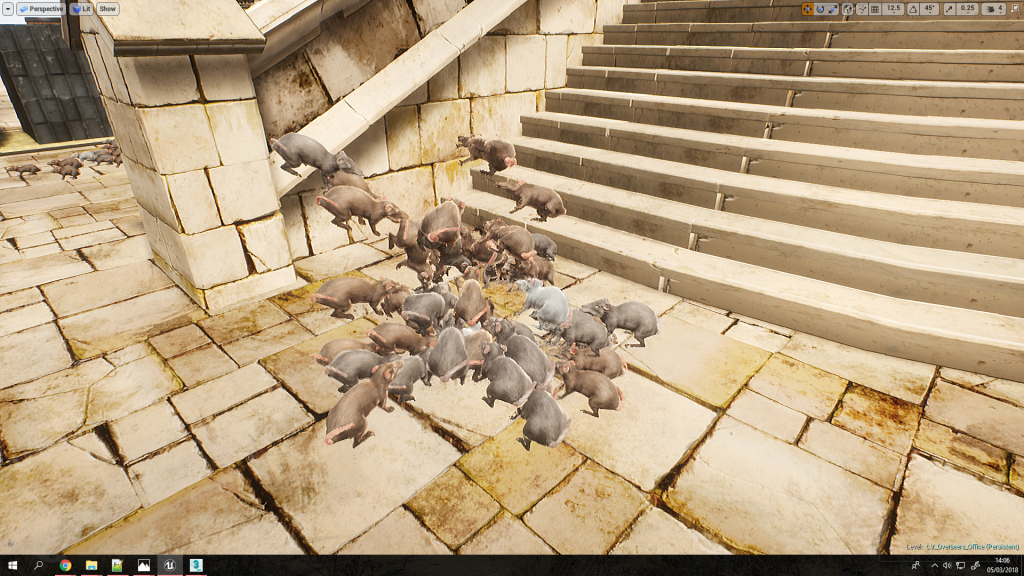
I also revised the FPS hands model to fit with the narrative and to bring it up to quality, as well as finish off the rats ready to use in the Blink VFX (as per the concepts).
Interiors
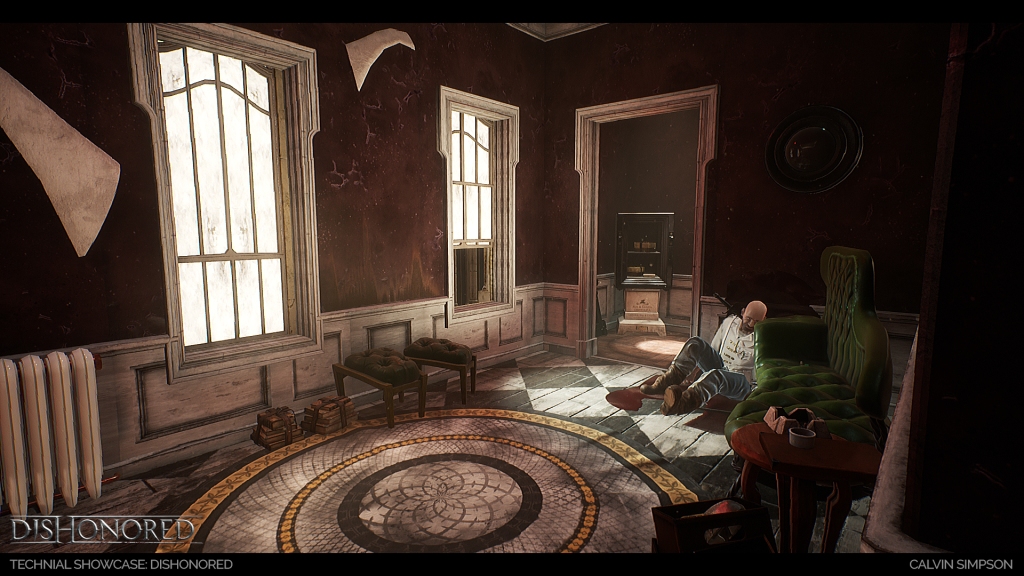
This week’s main focus has been on interior environment art in order to help flesh out the space in the levels. I want the level to feel expansive and a part of a real world, so interiors help me to do this, tell more of a story, and also provide more opportunities and routes through the level for the player.
In this example the player can climb through a window and use the stairs to gain access to the 2nd floor where they will encounter a torn up room with some environmental narrative and some pickups. They can then progress by climbing through the window to climb along the pipe system outside which provides a vantage point as a reward for exploring the level.
To create these interiors the new interior pieces had to use a standard size of 400cm in height, whereas the previous interior pieces (wallpapered wall kit from the prototype) uses 275cm, and the building pieces were 300cm in height (originally intended to provide 25cm of floor/ceiling space height). I have now overhauled the building pieces to use 400cm as the standard height, and using the building tiler system the transition has been easier. The Overseer’s office interior from the prototype had to be tweaked but remains in-tact and still utilises the 275cm height without any issues though this may change down the line.
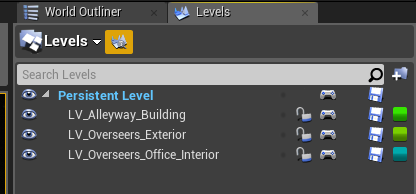
During the transition process I also started to separate areas into their own levels which utilise level streaming to be loaded in, whether I use this as just an organisation tool or something to actually optimise the whole level is something to look into down the line.
Revised Lighting Workflow
static/dynamic/stationary, shadows, fps (hitting 70-80fps)
I decided to revisit lighting as throughout my years of experience with building games the main killer of performance I have noticed is lighting and shadows. So I investigated heavily into how to actually utilise UE4’s lighting system which allows for a mix of static lightmapping, reflection mapping, shadow mapping, dynamic shadows, and dynamic lighting.
I found that the basic run down of the 3 lighting modes are:
- Static – diffuse contribution only (no specular contribution) but extremely cheap as it’s all baked into lightmaps
- Stationary – diffuse AND specular contribution, partial lightmaps, dynamic shadows, static shadows, can change intensity/colour at run-time (mix of static and dynamic essentially), can utilise IES textures and light functions
- Dynamic – can do everything stationary can but all lighting is dynamic, useful for dynamic global illumination (controlled through post processing)
If you want to read up in much more detail you can find where I found the majority of my research here – https://forums.unrealengine.com/development-discussion/content-creation/3076-static-or-stationary
Exterior Lighting
So with all that in mind I decided to utilise dynamic lighting in the exterior as this was the easiest and an exterior level is far too large in scale to utilise lightmapping where this could actually hurt performance, and only requires 2-3 light sources as dynamic, and some strategically placed bounce/fill lights for specific focal points.
My exterior lighting consists of atmospheric and exponential height fog in combination with a sky sphere – this creates the atmosphere and fogs out at a distance, while also allowing me to utilise volumetric fog/lighting (voxel lighting).

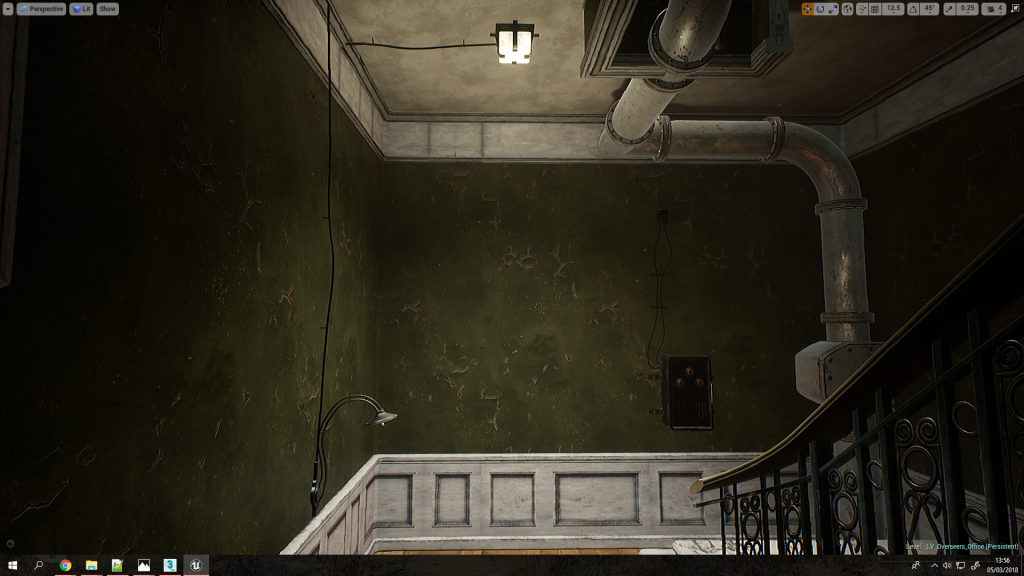
Interior Lighting
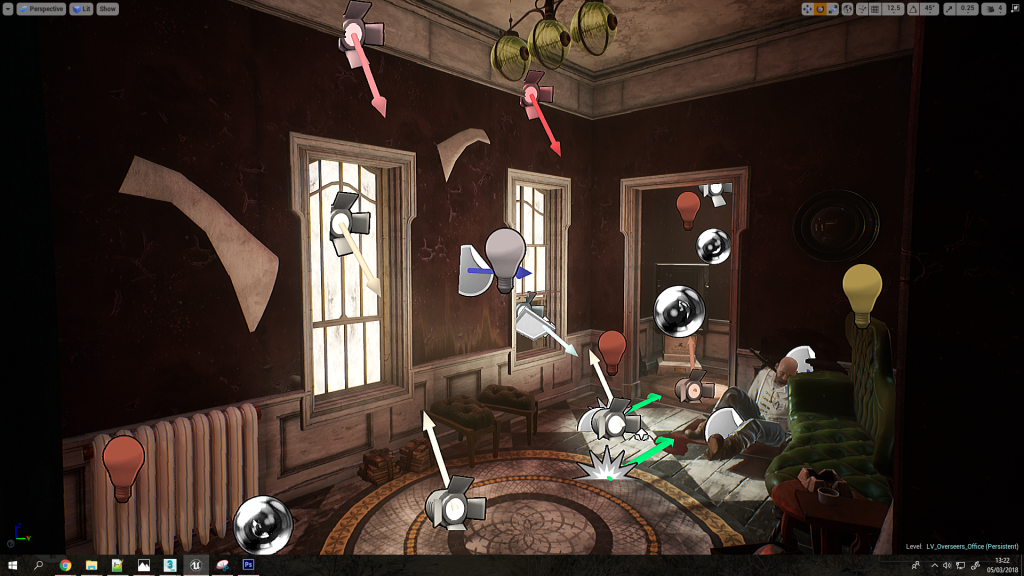
Lighting for interiors requires more intervention however with much more precise use of bounce lighting, fill lights, and reflection captures. I would normally use a lot more lights for interiors but that is a much more brute force approach which would only work with static lighting (which sadly doesn’t contribute to specular reflections, making lighting fall very flat).
So to revise my interior lighting workflow I very strategically place lights, starting from light sources and focal points first – usually with spot lights which I default to not using inverse squared (physically accurate lighting) as I am trying to fake in lighting (I will use inverse squared for physical light sources). And I also place reflection captures along the space (with a revised radius), and I will place more in areas with reflections need to more accurate (usually with metals/surfaces with very low roughness/high specular).
By default I also use stationary lighting and turn shadows off as this is the biggest performance killer – I will only use shadows in strategic areas such as from windows, and physical light sources (though these I will usually opt to use dynamic lights). If I do enable shadows I will almost always disable dynamic shadows unless I want to create a specific type of atmosphere or I know very specific gameplay will happen in that area. With my spot lights I also make good use of temperature, colour, intensity, inner/outer cone angles, falloff exponent, and min roughness.
For areas which transition from exterior to interior (or vise versa) I use light portals to help leak that sky lighting, as well as bounce cards (a spot light bouncing off a very light grey plane) outside – this helps to create soft shadows and lighting which feel more natural. And the bounce card technique is the same idea as pointing a light at a white sheet to fill out the space in photography shoots.
Technical details aside I will put in these focal light points, then follow the lighting round with bounce lights, usually adjusting colour to create mood and atmosphere, while also faking in and exaggerating global illumination as lighting will retain some energy (colour) from the surface it bounces from – so if a light hits a green wall it will carry that green as it bounces. I also use point lights to fill out dark spots, lift detail, and generate ambient lighting – these can use static lighting, or stationary with no shadows and adjustments to min roughness as they are not actual light sources so I don’t want them to be captured in reflections.
Materials
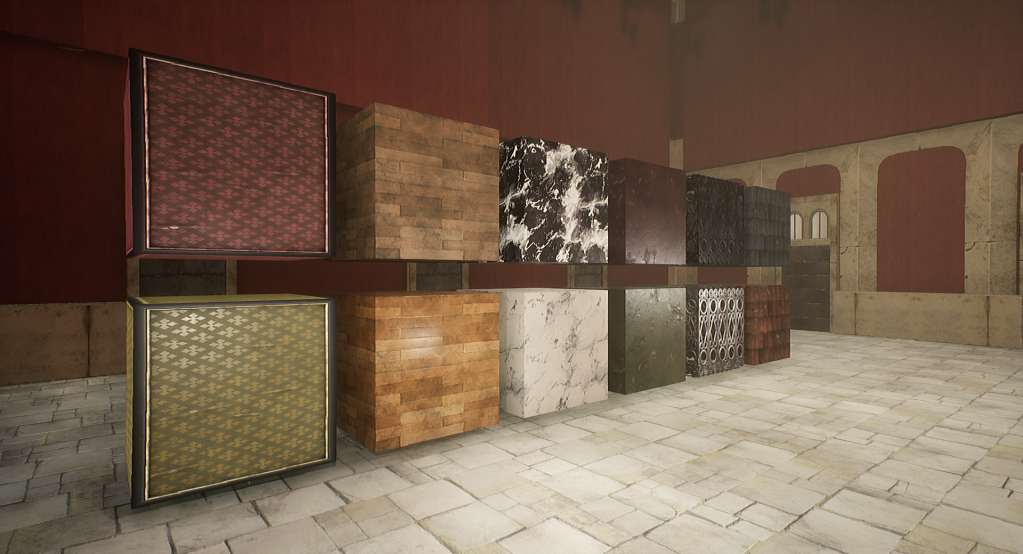
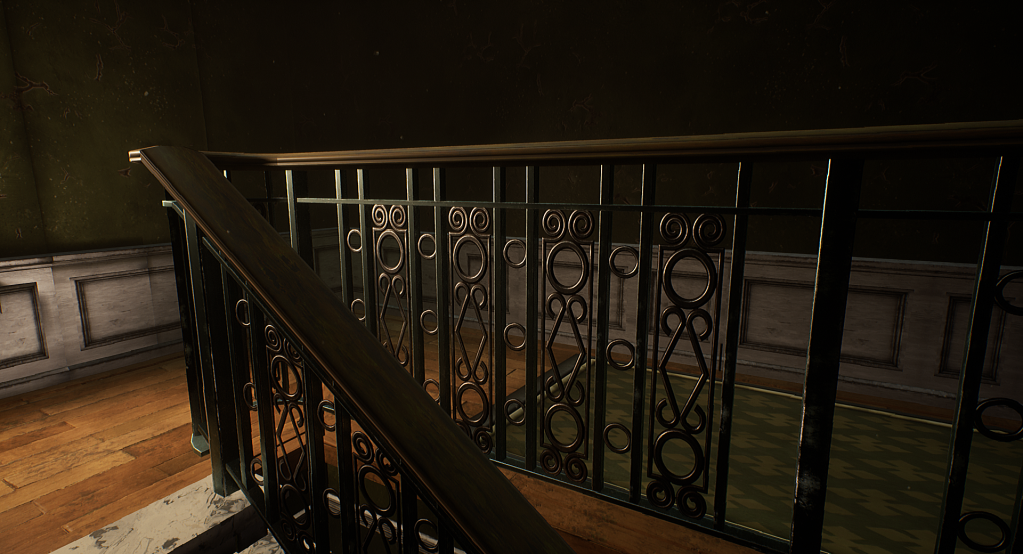
To achieve this I first focused on materials with a heavy emphasis on the Substance Designer to 3ds Max workflow I have been using throughout the project. I created new materials for wooden floorboards, a rug, an alpha cutout decorative trim (it would cost too much in geo to use the regular metal trim for those details), a rugged wall, and tiling marble (for the staircases). These materials can and most likely be re-used across many interiors and in other areas, as has the previous materials been re-used here.
I’m extremely heavy on procedural workflows wherever possible, so to create the decorative metal trim I utilised 3ds Max in a procedural way where I purely used splines, the loft modifier (to extrude closed shapes along splines), the symmetry modifier (to create the patterns), and double smooth tessellation (turbosmooth with Catmull-Clark tessellation by smooth groups, then again normally to polish edges). This allowed me to purely control the pattern by manipulating the symmetry modifier and editing splines (seen to the left).
This was then baked to a flat plane, tiled and textured using Substance Designer, and in 3ds Max applied to a plane using masked opacity blending, where I also cut out large areas of unused space to reduce overdraw. This is because with masked opacity overdraw only occurs in un-used space where the currently rendered fragment is thrown away if the opacity falls below a threshold – but the small overhead vastly reduces geometry complexity which would also cause issues with light maps due to how complex the geometry would have to be despite its small scale.


Window Shader – Directional Lit Translucency
I feel it’s worth mentioning that while creating the interiors I needed to find a way to help direct the player through them, as the lighting contrast to the exterior is massive so it can be easy for the player to get lost. This is also especially true as transparency isn’t an option as it will cause too many problems, so my solution was to integrate directional lit translucency to the backface lighting of interiors.
This works as all windows are only planes which ignore the winding order which would otherwise cull their backfaces, I can however in the shader determine what side of the face is being rendered to the current fragment (pixel), so I can use that to blend in the lighting contribution (added to emissive) which is calculated using the standard equation for lit translucency which is essentially lambertian diffusion except it passes through the object so the normal is flipped.
Light = -N.L or more simply put Light = Dot(Inverted Normal, Light)
The basic run down is that this means windows when viewed from the interior will emit light if the directional sun light passes through it, otherwise if it’s shadow the contribution is much smaller. The actual direction of the sun light is passed through a uniform variable (collection parameter) which is calculated from the forward vector (X) of a blueprint which extends the directional light class.
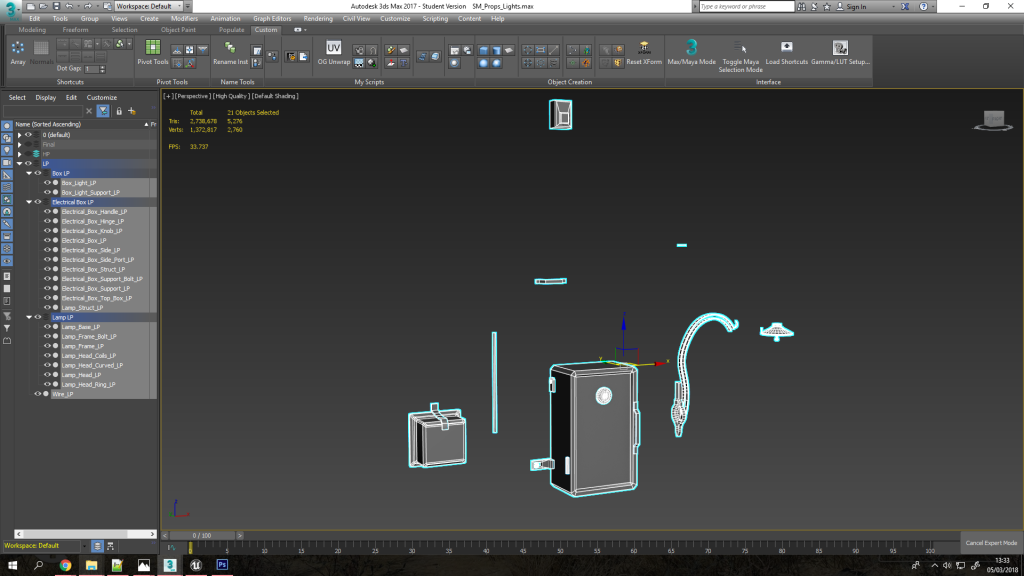
Props Workflow
I had to create some unique props for the interior as I needed to actually provide light sources to help me with the lighting. So I created these 3 props – a box light, a wall lamp, and an electrical box. They all use the same material to save texture memory, draw calls, and just generally reduce the texture count (helps with organisation).
My workflow for actually producing these props starts with the high poly generated from the low poly using the double smooth modelling workflow, which involves using one turbosmooth by smoothing groups and multiple iterations to tighten up the surfaces, then another turbosmooth to polish edges. This allows me to be much more free with my concepting and idea stage as I don’t have to worry too much about having to generate the same meshes with different topology and using nearly as many support loops.
I also use splines a lot to help generate the wires, lamp frame, and lamp head, as well as symmetry modifiers, and instanced geometry which allows me to work on a planar work environment while seeing the changes applied in real time to the piece with the correct orientation and position on the prop itself. I also keep in mind repetition, patterns etc for my low poly down the line (such as the wire for example).
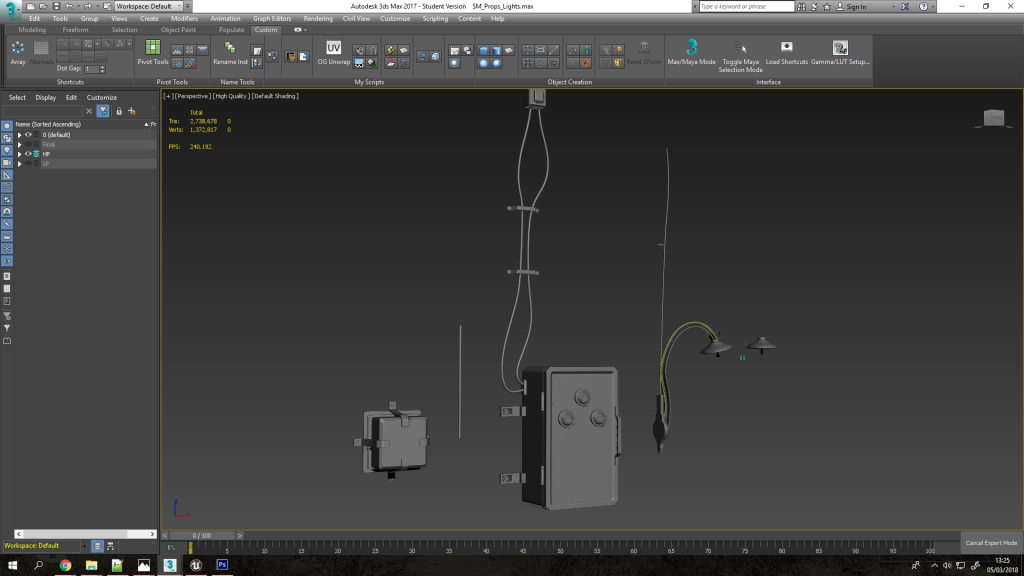
Generating the low poly is as easy as duplicating the prop pieces, removing what I don’t need to save texture space (this will be repeated back later), adding support loops/geo for the bakes (especially on cylinders), and creating one tiling piece of wire (the UVs will range from 0 to 1 in V so I can tile that one section, and the U seam will be hidden).
I also use smoothing groups as opposed to chamfers for the most part as this makes unwrapping easier as the geo is simpler, and provides a better bake (the bevels will be captured regardless). When I unwrap I usually use unwrap by smoothing groups, or for more complex pieces I use my custom script which breaks edges by smoothing groups – this whole process is much quicker using all the custom scripts I’ve written as seen on my custom ribbon.
I then export both the low and high as a single FBX for each with tangents & binormals (incorrectly named, should be named to bitangents but oh well!), and smoothing groups. These are then baked by mesh name (important for avoiding intersecting bakes), once the bake is fine and finalised with no UV errors then I begin layering on base materials I’ve amassed in my library (usually consisting of base with baked lighting > overlays > roughness > fine detail > dirt > sharpen).
I fine tune the materials and paint in any specific details after that, where I try to stick to being as procedural for as long as possible so I can fine tune the lookdev with ease. This is done by using lots of generators, fill maps, grunge maps, noise maps, mask building, filters etc.
I also use the baked lighting filter for my base material – though I even out all the directional lighting contributions so it’s extremely subtle, and then adjust AO/cavity & edges so that it makes the asset pop a bit more while remaining physically accurate (as per the Dishonored 2 style).
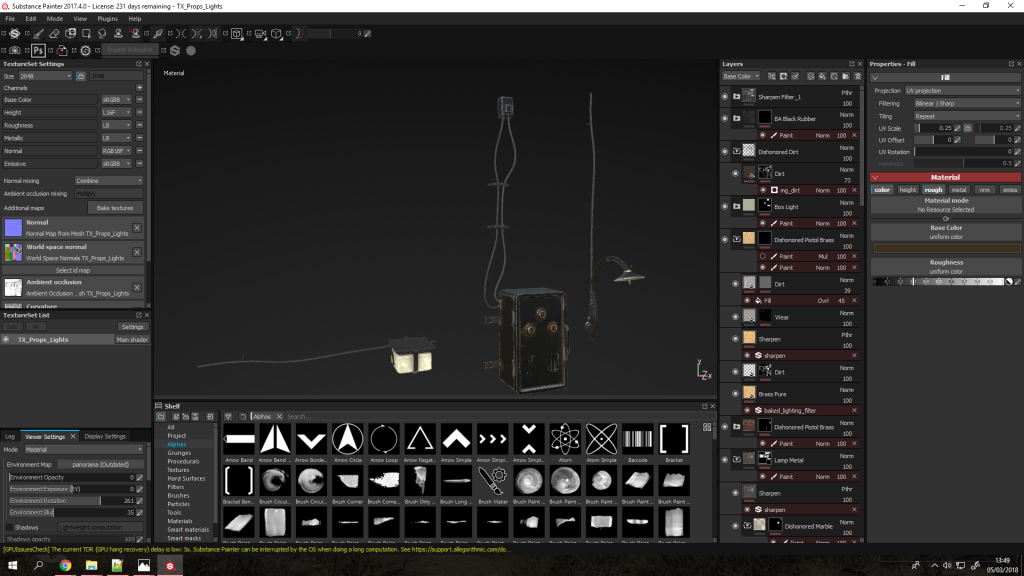
The textures are then exported using a custom export preset which packs the metalness, roughness, and ambient occlusion into one texture, and ensures all naming conventions are correct by using the material name (set in 3ds Max, for example TX_Props_Lights will give me a normal map named TX_Props_Lights_N). And with these textures applied (so I can see the ambient occlusion namely) I duplicate the low poly meshes again, remove support loops/geo/tessellation, and set up the symmetry modifiers and instanced geometry again then combine each prop into one mesh, name it, ensure the pivot is placed sensibly and the prop has a sensible orientation, then batch export which gives me an FBX using the mesh’s name.
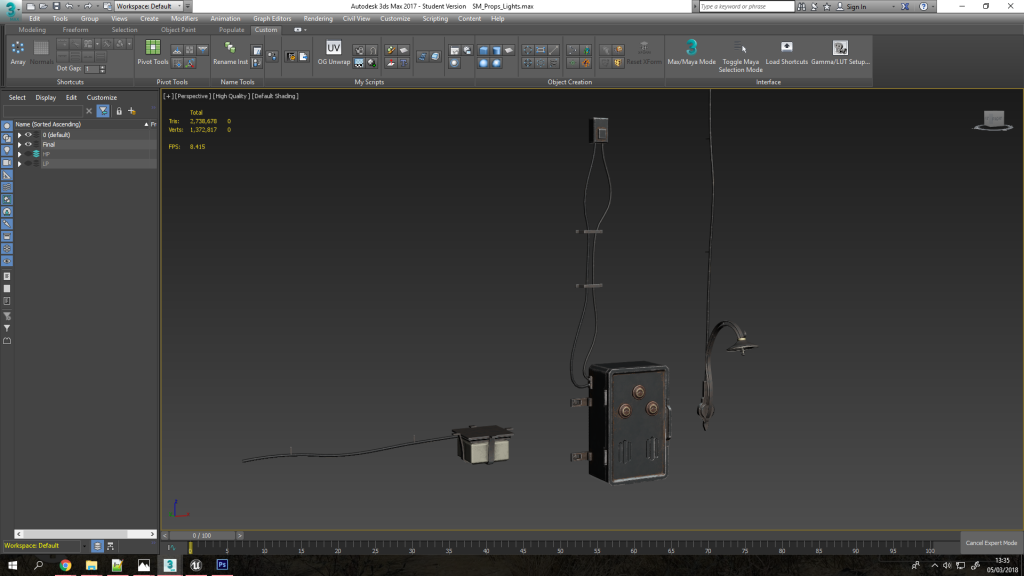
These props are then imported into UE4, materials set-up, collisions set-up (I used a series of box colliders for the wall lamp), and placed in the world.
When placed in the interiors I feel these really help sell the feeling that world is connected, along with pipe systems etc leading up through the walls. This to me is vital as the player will be experiencing these environments and exploring them, not just looking at images of them where I can choose what they can or can’t see.
Revised FPS Hands
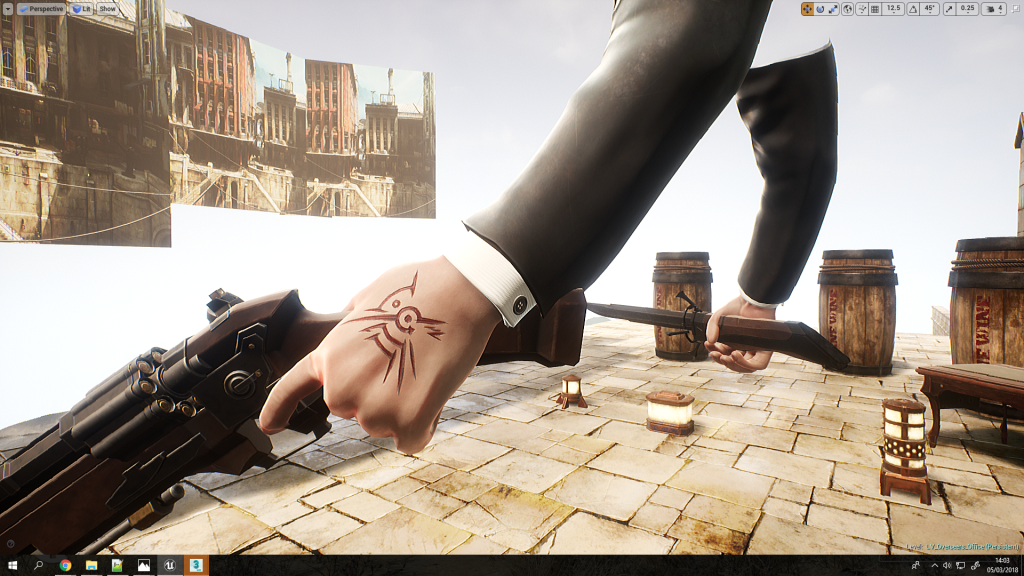
I also revised the first person arms as I felt the old model from the prototype was lacking in quality and polish, and the hand model also felt very off. So I refined the sculpt and simplified the model to match the character choice I chose earlier in pre-production (The Outsider) – opting for a more simple design of just simple sleeves and cuffs with a button, and more stylised and slightly larger hands.
")
")
I also incorporated some more narrative by changing the outsider’s tattoo into a red scarred version cut into the back of his hand. I made this choice as the Outsider doesn’t bare his own mark as he is the one who grants it as a gift to others in the storyline, so to stay true to this and the *spoilers* ending of Death of the Outsider in which he is freed (canonically returned to his mortal form), I felt it was fitting he would try to access the power of the void where he was trapped through very crude means. The tattoo also now glows red as a result of this as I wanted the powers to feel much more raw and less tame.
Rats
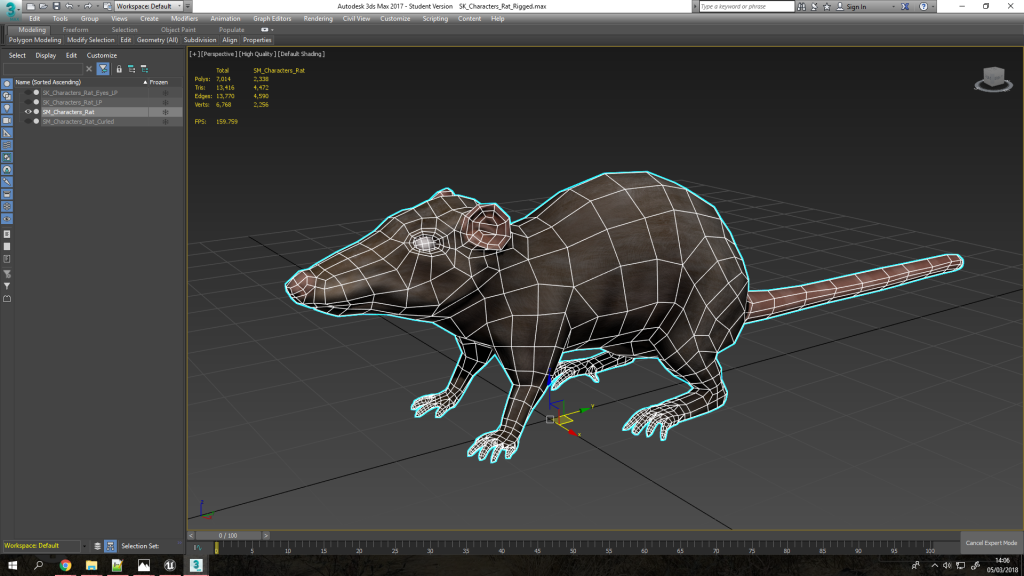
I also completed the rat model which was modelled in ZBrush using dynamesh and ZSpheres first, then retopologised using the freeform tools in 3ds Max. I kept the topology very low as there will be many on-screen at once using particles, but also optimised for animation as I will be rigging them for specific animations (such as climbing along the player’s hand during Blink), and potentially for scuttling around in the world.
Where now?
This week I will be focusing on polishing up my progress report for the deadline, along with creating environment assets aimed at the exterior portions of the level, along with further expanding the level per the level design top down plan (namely the docks and shop/courtyard area). I will also work on VFX for the Blink ability, and if I have time I’ll start designing and implementing in the guard’s AI & stealth system – if not I will be working on that next week alongside animations to accompany the guard’s various states & combat.
